News
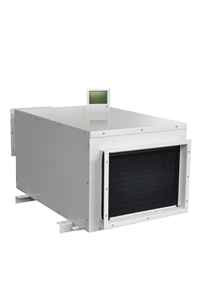
Controlling a ceiling-mounted dehumidifier involves several steps to ensure it operates efficiently and meets the specific humidity control needs. Here's a general guide:
1. Install a Humidity Controller
-
Humidity Controller/Thermostat: Many ceiling-mounted dehumidifiers can be paired with a wall-mounted humidity controller. This device allows you to set a desired humidity level, and the dehumidifier will turn on or off automatically based on the room's humidity.
-
Steps:
- Mount the controller on the wall in an easily accessible location.
- Set the desired relative humidity (RH) level. A typical indoor RH level is 40-50%.
- Wire the controller to the dehumidifier following the manufacturer's instructions.
-
Steps:
2. Manual Controls on the Dehumidifier
- On/Off Switch: Some ceiling-mounted dehumidifiers have a simple switch that allows manual control. Turn the unit on when you want it to operate and off when not needed.
- Adjustable Humidistat: Many models include an integrated humidistat to set the humidity level directly on the unit. This allows automatic operation without external controllers.
3. Remote Control Operation
- Wireless or Infrared Remote Control: Certain ceiling-mounted dehumidifiers come with remote controls for adjusting settings, changing fan speeds, or turning the unit on and off. The remote can be especially helpful if the dehumidifier is installed high up.
- Smartphone Apps (Wi-Fi Enabled Models): Some dehumidifiers are Wi-Fi-enabled and allow you to control the unit remotely through a smartphone app. This provides options to monitor and adjust humidity settings, view the current humidity level, and schedule operations.
4. Fan Speed Control
- Adjustable Fan Speeds: Many dehumidifiers offer multiple fan speeds for adjusting airflow based on the humidity load. Higher fan speeds can be used for quick humidity reduction, while lower speeds are more energy-efficient for maintaining desired humidity levels.
5. Automatic Drainage System
- Condensate Pump: If the ceiling-mounted dehumidifier is equipped with a condensate pump, it will automatically drain collected water. Ensure the pump is properly connected and the drainage line is clear.
- Gravity Drain: If using gravity drainage, make sure the drainage hose is properly routed to a drain outlet.
6. Maintenance and Filter Cleaning
- Filter Cleaning/Replacement: Regularly check and clean or replace the air filter to maintain efficient operation. Clogged filters can reduce airflow and cause the unit to work harder than necessary.
- Drainage System Check: Periodically inspect the drainage system to ensure water is being removed properly.
7. Scheduling and Timers
- Set Timers (if available): Many ceiling-mounted dehumidifiers have built-in timers for scheduling their operation at specific times. This can be useful if you only need dehumidification during certain hours.
8. Check for Energy Efficiency Features
- Auto-Defrost: In colder environments, an auto-defrost function prevents ice buildup on the coils.
- Auto-Restart: Some dehumidifiers automatically restart after a power outage, resuming the last settings.
Following these steps ensures that your ceiling-mounted dehumidifier operates smoothly and maintains the desired humidity levels in your space.

